Non-surgical treatment
(1) Corrective gymnastics therapy
The efficacy of corrective gymnastics for scoliosis is still controversial. However, according to the author's results of corrective gymnastics treatment for idiopathic scoliosis within 20 °, the regression rate of scoliosis in the treatment group was 29.6%, which was significantly higher than that in the untreated and observation group. The principle of corrective gymnastics is to selectively strengthen the muscles that maintain posture in the spine. Adjust the balance of muscle strength on both sides through the convex sacral spine muscles, abdominal muscles, lumbar muscles, and quadratus lumborum muscles. Traction of contracted muscles, ligaments, and other soft tissues on the concave side to achieve corrective effects. Corrective gymnastics has different effects on different developmental stages and types of scoliosis, especially for children or those with mild idiopathic scoliosis in early adolescence and good flexibility without significant structural changes. Gymnastics therapy can achieve good therapeutic effects. However, for significant structural changes and congenital scoliosis, it is difficult to use corrective gymnastics alone, and it needs to be combined with other non-surgical treatments, especially braces. Therefore, gymnastics therapy remains a necessary auxiliary therapy to prevent muscle atrophy and other disuse changes caused by braking. Below is a set of orthopedic gymnastics developed by the author. Several key exercises can be selected based on the patient's different conditions. The complete set of gymnastics consists of nine sections:
1. When crawling forward and backward, the patient should lie in the elbow and knee position and use the elbow and knee to crawl forward and backward (Figure 1).
Figure 1 Front and Rear Crawling
2. Left and right leaning patients kneel, raise their hands, sit with their hips tilted to the right (a), and then tilt to the left
Sit (b, c) and practice alternately repeatedly (Figure 2).
Figure 2 Left and Right Side Sitting 3. The patient is lying prone with their nose facing the ground and their shoulders outstretched. Their elbows are flexed and their hands are pushed forward, with their head extended as much as possible. They use their head to touch the wall, then retract their head and touch the wall again with their head. Repeat the exercise (Figure 3). Figure 3: Touching the wall on the top of the head. 4. Extend both arms horizontally. The patient lies prone with both hands resting in front of the forehead. Gradually lift both arms off the ground, straighten them forward, and then return both hands to the front of the forehead. Repeat this practice (Figure 4).
Figure 4: Double arm extension 5. Sit up: The patient lies on their back, with both arms extended and placed flat on the cushion. Then sit up, with the body bent and both arms extended forward, with both hands touching the toes. Slowly raise both arms back to the supine position (Figure 5).
Figure 5 Sit up 6. Lower limb extension: The patient lies prone, with both shoulders outstretched and both elbows half bent. The palms of both hands are placed flat on the cushion, and both lower limbs are extended backwards and lifted from the cushion. The left and right legs are crossed up and down in a scissor motion (Figure 6).
Figure 6: Posterior extension of lower limbs
7. Raise the patient's legs and lie on their back, with both hands resting under their heads. Bend both lower limbs in half, place both feet flat on the cushion, and then lift both lower limbs up. Perform alternating scissor movements between the legs (Figure 7).
Figure 7 Legs up 8. Deep and slow breathing: The patient lies on their back, with both upper limbs placed flat on both sides of the body, palms facing upwards, and both lower limbs half bent. Place both palms flat on the cushion, take a deep breath through the nostrils to expand the chest, then make a light exhale and slowly exhale through the mouth (Figure 8).
Figure 8 Deep inhalation and slow exhalation 9. Stand upright with both feet parallel to the wall, keeping the shoulders and hips tightly against the wall, and making the head, neck, and spine as straight as possible (Figure 9).
Figure 9 Standing upright (II) Electrical stimulation therapy braces are a good method for controlling the aggravation of scoliosis. However, due to the limitations of braces on patients' daily activities and bulky appearance, in hot areas, patients cannot tolerate braces with poor ventilation, often causing children or parents to give up treatment halfway and be willing to accept electrical stimulation therapy. The commonly used electrical stimulation currently is a dual channel surface electrical stimulator. Two sets of electrodes are placed at specific positions on the surface of the body on the convex side of the scoliosis. The rectangular electric shock waves alternately output from the two channels cause the two sets of paraspinal muscles to alternate between contraction and relaxation, thereby providing sustained corrective force to the scoliosis spine, in order to prevent the aggravation of scoliosis. The better indications are idiopathic scoliosis and neuromuscular scoliosis below 40 ° with good flexibility in younger age. Specific treatment method: 1. Before positioning treatment, take X-ray images of the standing spine in front and back positions. Based on the X-ray images, identify the top vertebra with scoliosis and the ribs connected to it. The intersection points A and B between this rib and the patient's axillary posterior line and axillary midline are the reference centers
Mark the axillary posterior line and axillary middle line at 5-6cm above and below to indicate the position of the electrode plate. The distance between the same set of electrode plates should not be less than 10cm.
2. The determination of effective intensity requires sufficient intensity of electrical stimulation to achieve therapeutic goals. Generally, the intensity of electrical stimulation is estimated by observing with the naked eye whether there is improvement or straightening of scoliosis during muscle contraction Touch the child's spinous process during muscle contraction to see if there is any movement Observe whether there is a decrease of more than 10 degrees in the angle of curvature with and without electrical stimulation through filming. If the above requirements are not met, adjust the electrode plate position forward or backward, or slightly increase the distance between two electrode plates in the same group to find the best stimulation point, and gradually increase the current intensity to 60~70mA.
3. Treatment prescription for the first week: On the first day, the stimulation is half an hour, twice a day. On the second day, the stimulation is 1 hour, twice a day. On the third day, the stimulation is 3 hours, once a day. Afterwards, the stimulation is once a day, increasing by 1 hour each time, until the seventh day, the stimulation is 7 hours. The current level increased from 30mA on the first day to 70mA on the seventh day. After a week of daytime treatment, the child gradually adapted and parents were taught how to correctly use the electrical stimulator and place the electrode plate. In the future, treatment will be changed to nighttime. After the child falls asleep, turn on the instrument and start the current intensity from 30mA. After a few minutes, gradually adjust it to 60-70mA to avoid too strong stimulation and waking up the child.
At the beginning of the treatment phase, pay attention to the occurrence of rash. Regularly check the stimulation points to prevent insufficient stimulation intensity and duration. Electrical stimulation therapy requires persistence. To achieve good therapeutic effects, it can also be combined with brace therapy.
(3) Support therapy
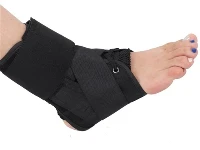
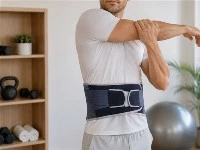
Brace treatment plays an important role in non-surgical treatment of scoliosis. Winter et al. treated 95 cases of idiopathic scoliosis with Cobb angles between 30-39 ° using Milwaukee braces, but stopped using them after bone growth maturity. After two and a half years of follow-up, 84% of the scoliosis remained unchanged or showed improvement. The author treated 215 patients with idiopathic scoliosis with an average Cobb angle of 28 degrees using Milwaukee braces for cervical and thoracic scoliosis, and Boston braces for thoracolumbar and lumbar scoliosis. After an average follow-up of 26 months, the effective rate of no change or reduction in scoliosis was 82%. Brace therapy is suitable for idiopathic scoliosis in adolescence and puberty, and is ineffective for scoliosis with congenital scoliosis or mature bone development. There are two main types of commonly used treatments for scoliosis: CTLSO and TLSO.
The fixed range of CTLSO includes cervical, thoracic, lumbar, and sacral vertebrae. The Milwaukee brace is its representative, the part that wraps around the pelvis is made of plastic, with three pillars attached on the outside, one front and two back. Three pillars are connected to the neck collar at the neck, with the back of the collar serving as a pillow support and the front closely attached to the lower jaw of the anterior laryngeal support. CTLSO is suitable for scoliosis with the top vertebra above T8. Add pressure pads or straps to the column as needed, and the main pad should be placed at the level of the convex top vertebra. The position of the pressure pad should be biased towards the outer side as much as possible to increase the horizontal force.
The fixed range of TLSO includes the middle and lower thoracic vertebrae, lumbar vertebrae, and sacral vertebrae. The Boston brace is its representative. TLSO is suitable for patients with scoliosis of the top vertebrae below T8. The brace is made of plastic, with the upper end extending to the armpit and the lower end wrapping around the pelvis. This type of brace can be covered by clothing without affecting aesthetics and is easy for patients to accept. But this type of support must be sampled with gypsum. Even under traction or pressure pads, samples are taken and made into a negative mold, which is then made into a positive mold. Then use plastic to make a support on the male mold for better orthopedic effect.
3. The time for wearing braces should not be less than 23 hours per day, with 1 hour reserved for activities such as bathing and gymnastics. Supportive treatment requires persistence, and if there are no contraindications, the use of braces should be continued until bone growth and development are mature. stop
Indicator for using braces: ① No increase in height within 4 months. ② Risser sign grade 4-5 (iliac crest epiphyseal elongation and fusion). Take a photo of Cobb angle 4 hours after removing the support. To achieve the above indicators, the daily wearing time of the brace can be 20 hours. After 4 months of re examination, there was no change, reduced to 16 hours. If the re examination is still stable, it will be changed to 12 hours. After another 3 months, remove the brace and take a spinal radiograph 24 hours later. If there is still no change in Cobb angle, stop using it. If the deformity worsens during this period, it is still necessary to restore the use of braces for 23 hours a day.
(4) Traction therapy
Traction therapy can prevent or slow down the further aggravation of scoliosis, or provide a certain degree of improvement in scoliosis. Traction therapy is currently more important as a preoperative preparation for scoliosis to achieve maximum correction during surgery. Prevent one-time stretching during surgery to avoid or reduce the occurrence of complications of spinal cord nerve injury. There are many methods of traction, such as neck traction, inclined table neck traction, neck pelvic sleeve traction, head pelvic ring traction, and supine anti suspension traction. The latter two are now introduced as follows:
The head pelvic ring traction device was first designed and clinically applied by Dewald and Ray in 1970. It consists of a headband, pelvic ring, and four support rods. The head ring is fixed to the skull with specially designed screws, while the pelvic ring can be fixed with Kirschner wires, specially designed screws, leather waist or lumbar plaster.
(1) Head ring installation: The patient's hair is shaved off, and they lie on their back with their head supported and fixed outside the edge of the bed by an assistant. The skin is disinfected regularly and the operation is performed under local anesthesia. The headband should be placed below the maximum diameter line of the head, 1cm above the brow arch and 1cm above the ear tips. The distance from the head ring to the scalp is 1-1.5cm, and the head ring is connected and fixed to the skull with four specially made skull screws. Two cranial nails are inserted into the skin 1cm above the outer 1/3 point of the eyebrow arch. The two cranial nails behind are twisted diagonally into the anterior cranial nail until the torque reaches about 6kg (three fingers cannot move it), and then screwed into the outer plate of the skull.
(2) After pelvic ring installation under general anesthesia or local anesthesia, the patient is placed in a lateral position with the surgical side on top. The assistant places a Kirschner wire at the posterior superior iliac spine as a guide, and the surgeon inserts the Kirschner wire from 0.5cm below the anterior superior iliac spine in the direction of the guide wire. The ideal exit point should be at the center of the posterior superior iliac spine. The needle insertion on one side is completed, and the flipping operation on the opposite side is difficult with multiple complications. At present, screw fixation method is mostly used, that is, the patient lies flat on the orthopedic operating table, the pelvis is suspended, and an assistant holds the pelvic ring. Two surgeons screw three specially designed screws from each side at a distance of 0.5cm below the anterior and superior iliac spines on both sides, and every 1.5-2.0cm from front to back, until the pelvic ring is firmly secured.
Do not use traction for 2-3 days after surgery. After the pain in the needle hole disappears, install a support rod. Three days after surgery, the fixing screws should be tightened daily, and the adjusting screws should be tightened 1-2 times a day until the desired correction is achieved.
2. Scoliosis anti suspension traction device consists of a traction belt, pulley, rope, and heavy hammer. The patient lies on their side in the traction belt, with the convex side of the bend facing downwards. The weight gradually increases from 10kg to 40kg, with the apex of the convex side 5-8cm away from the bed, within the patient's maximum tolerance. If it is only for preoperative preparation, the traction time is generally about two weeks. By traction, the soft tissue on the concave side is released, and the spinal concave side is effectively extended. This method is simple, convenient, with few complications, reasonable mechanics, and accurate results. Patients are free to enter and exit the traction device without the need for special care. It can be used for traction in hospitals, as well as at home or in temporary wards.